Wednesday, May 26, 2010

Chicken Fajitas...

Remember how we started these past few recipes? 

Chicken cutlets were on sale and I wanted to share with you
how I take advantage of them when they're on sale. 

If you read my post on how I prepare my pre-cooked chicken cutlets
you'll remember that besides pre-cooking the cutlets,
I also wrapped half the package of cutlets individually in 
aluminum foil and placed them in a freezer storage bag in the freezer.

That way, when I want to use the chicken cutlets for a variety of meals,
I just pull how many cutlets I need for the meal.   

I've always frozen my chicken cutlets wrapped individually in aluminum foil 
since I was first married many, many moons ago. 

Here's a recipe we all love...
Chicken Fajitas

  • 3 Chicken breasts
  • 3 Peppers, try to use different colors.  When I made these only green peppers were on sale.
  • 2 Onions
  • Italian salad dressing
  • Flour tortillas
  • Cheddar Cheese
  • Sour Cream
  • Salsa
DIRECTIONS:
 Cut the onions and peppers up early in the morning.
Place them in a Tupperware, toss them with some of the bottled Italian dressing
and let them marinade in the refrigerator all day.

Here they are going on the grill.
They can take up to 30 minutes to cook.
Remember to check them and stir them!
I purchased this great grilling basket last year.  
LOVE IT!

Grilled vegies all done and ready to go!

Take 3 chicken cutlets from the freezer the night before and let them 
defrost on a plate in the refrigerator. 

In the morning,  unwrap and place them in a baking dish or a Tupperware
and marinade them also in some Italian dressing.  
Place them back in the refrigerator until you're ready to start dinner.

All grilled and looking delicious...

Here the fajitas are all assembled...
Feel free to add sour cream and salsa,
which I did AFTER I took the above picture! 

Enjoy!

Please note, if you DO NOT have a grilling basket like mine, you can STILL make this dish!
Just place your peppers and onions in some aluminum foil
and place on the grill.  
You'll need to really watch them so they don't burn on you. 
This is how I use to make them before I purchased the grill basket.  

Monday, May 24, 2010

What to do on a Busy Day...

When I have an extremely busy day, 
I go to my package of pre-cooked chicken cutlets,
that I've prepared and frozen,
and place them in a cooking dish in the refrigerator to 
defrost all day. 

About 30 minutes before dinner, 
I cover them in tomato sauce, home-made of course, 
and add some mozzarella cheese...

Bake at 385 for about 15 minutes or until they look
DELICIOUS
and your house smells like Little Italy...

While the chicken is cooking in the oven,
I make a nice side dish of spaghetti and a yummy salad.

Now doesn't that look DELICIOUS?
Dinner on the table in 30 minutes...

Feel free to add some crusty Italian bread!

ENJOY!

Friday, May 21, 2010

Easy Dessert

Okay, so you'll have to come back on Monday for another easy 
meal made from my pre-cooked chicken cutlets. 

I think a nice yummy dessert is just what we all need for the weekend!

I made these awhile ago and they were a hit.
VERY EASY!

Simple Chocolate Croissants


1 pkg. refrigerated croissants

Semi sweet chocolate chips

3 tbsp. melted butter

Confectioners sugar


DIRECTIONS:

Unroll and flatten dough. 

Separate into triangles. 

Brush with melted butter. 

Sprinkle 1-2 tsp. chocolate chips on each triangle. 


Roll each triangle into a croissant shape and place on a cookie sheet. 

Bake in a preheated 375 oven for about 15 minutes. 

Let cool briefly and sprinkle with powdered sugar. 


YUMMY!  

Enjoy your weekend!

Okay, I have a confession to make...

These pictures aren't mine. 
I tried to upload the pictures I took of the chocolate croissants I made, 
but for some reason Blogger wouldn't let me. 

So I had to Google some pictures.  

Hope you're all okay with that!

Thursday, May 20, 2010

Chicken Cutlets...

When I know we're going to have a CRAZY day, 
I go into the freezer, grab a few of my pre-cooked chicken cutlets
and place them in a baking dish letting them defrost in the refrigerator all day. 

I bake them in the oven at 375 for about 15 minutes 
or until they're cooked all the way through...

We never eat frozen French fries anymore. 
I make my own. 
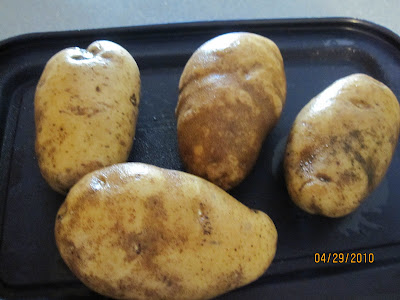
Wash a few potatoes, cut them into chunks or whatever size you desire...


Sprinkle with seasoning salt or whatever flavors you like, 
toss in oil or spray with Pam.  
Bake them in a 425 oven. 
I finish them under the broiler to get really crispy...
Here's the finished meal. 
Chicken cutlet, crispy potatoes, steamed carrots and a salad.
All on the table within 30 minutes. 

The picture is a bit boring looking, sorry! 
The plate was not big enough for the salad to make it look more colorful.

Come back tomorrow to see Meal #2!
Enjoy!

Wednesday, May 19, 2010

Chicken Cutlets

So what do YOU do when chicken cutlets are on sale? 

This package says $1.99 a pound, but I had a coupon and actually purchased 
them for $1.69 a pound.
Instead of just throwing the whole package into the freezer, 
I take some steps NOW to make cooking easier on busy days.

This is what I do with my chicken cutlets. 
I take them all out of the package and if they're really thick, 
I'll slice them them in half, making them thinner and trim the fat off.  

Then half of them will go into a bowl with beaten eggs.
After I rinse them, of course!

Then into a baking dish of bread crumbs...

And into a hot pan with a little oil.
I only brown them.  
They're not cooked through...


Drain on some paper towels...

Then I wrap them individually in aluminum foil 
and place in a bag and throw the bag in the freezer...

The ones that WEREN'T cooked, just get wrapped up individually in 
aluminum foil and placed in a different bag 
and thrown in the freezer...

Come back tomorrow to see how I turn the above packages into meals!

Tuesday, May 18, 2010

Sneaky Baked Ziti...

This recipe is from my friend Jani
She has 3 children and cooks very healthy for her family. 
Below is a recipe that I think would be a great addition to any family 
trying to get more vegetables into their diet.

Enjoy!

INGREDIENTS:

1 lb. lean ground turkey
2 c. carrots
1 small onion
2 cloves garlic
1 large can tomato puree
2 cans diced tomatoes
salt, pepper, garlic powder, red pepper flakes as desired
1-2 T. honey, agave nectar or sugar
1 lb. ziti 
2 c. mozzarella cheese, grated

DIRECTIONS:
  • Put a large pot of water on to bowl, cook pasta al dente, drain and set aside.
  • In a large skillet heat olive oil and cook ground turkey over medium heat. Season the meat as desired with garlic powder, red pepper flakes, salt and pepper.
  • In a food processor (this is where it gets sneaky) add carrots, onion, garlic, and the large can of tomato puree. Process sauce until smooth. 
  • Add sauce to ground turkey with the two cans of diced tomatoes. The meat sauce should be a nice consistency although you may need to add a bit of water if it is too thick. 
  • To finish this meat sauce add about 1-2 T of honey. The honey is not going to make the meat sauce sweet, it will just take the bitterness out due to using canned tomatoes. 
  • Combine meat sauce with the pasta and pour into a 9X13 pan. 
  • Sprinkle mozzarella cheese over the top of the pasta. 
  • Bake at 350 for 30 minutes.
A note from the cook:

I really love this dish. I make it low sodium, and it is delicious. 
The carrots give the sauce a creamy color and you won’t even miss the ricotta.

Thursday, May 13, 2010

Coffee Cake

Today's recipe comes from Jacquelyn, one of my blogging friends. 
Sounds yummy!

Easy Coffee Cake
Ingredients:

2 sticks butter
1 1/2 cups sugar
2 eggs
2 cups flour
1/2 tsp. baking soda
1 1/2 tsp. baking powder
1 c. sour cream
1 tsp. vanilla

Filling: 
3/4 c. chopped nuts
1 tsp. cinnamon
1 Tbsp. sugar

  • Beat all the cake ingredients together in a mixing bowl.
  • Combine all the filling ingredients together in a separate bowl. 
  • Pour 1/2 of the batter into an angel food or fluted pan that has been sprayed with non-stick spray such as Pam. 
  • Sprinkle half of the filling on the batter. 
  • Pour the balance of the batter in, then the remaining filling on top. 
  • Bake at 350 degrees for 55 minutes. Start in a cold oven.
  • When cool, sprinkle cake with powdered sugar or drizzle frosting on top if desired.


Wednesday, May 12, 2010

Faux Crab Cakes...


This recipe is from my sister Liz.  

INGREDIENTS:

4 cans solid white tuna in water
1 cup bread crumb or more you don't want your mixture too wet, so add more if too wet you want it dry enough to form patties
2 eggs
2 tsp mustard
1/2 cup mayo
1 tsp salt
pepper to taste
1 tsp oregano
1 tsp garlic powered
1 tbs lemon juice

DIRECTIONS:

  • Combine everything in a bowl. 
  • In a frying pan heat about 3 tbs oil, form the mixture into patties, I use an ice cream scooper, and fry for about 5 minutes on each side until golden brown. 
  • Drain on paper towels. 

For the honey mustard sauce: 
  • 1 cup mayo, 1 tbs honey, 2 tsp mustard and 2 tsp lemon juice.
  • Whisk together and serve on top of the crab cakes.
ENJOY!

Tuesday, May 11, 2010

Fruit Tart

Today I'm sharing a recipe for Fruit Tart.
This is such a delicious and easy dessert to make.  
When I first discovered this recipe,  I served it to my father and 
he wanted to know which bakery I purchased it from!
Ingredients
2 cups sugar
2 packages cream cheese, softened
1 container Cool Whip, softened
2 tubes crescent rolls
Assorted fruit


Unroll crescent rolls. Lay flat on a baking pan, pressing seams together. 

Bake at 350 until lightly browned.

Using a hand mixer, combine the sugar, cream cheese
 and container of cool whip.
Spread evenly over the COOLED crescent rolls.

Then take your assortment of fruit, here I used canned peaches, DRAINED, 
 sliced strawberries and blueberries.


One tart with peaches, strawberries and blueberries.

One tart with peaches, strawberries, blueberries and banana.
I usually try and assembly this tart pretty close to when I need to serve it.
You can prepare everything ahead and refrigerator until you are ready for dessert.
I will make the cream cheese mixture and store in tupperware the day before.
You can do the same with your fruit.  
Prepare the fruit the day before and store in tupperware in the refrigerator.

ENJOY!

Sunday, May 9, 2010

Chicken Francais

Today's recipe comes from Fran.  
This recipe sounds DELICIOUS and EASY!

INGREDIENTS:

2 eggs
1/2 c. grated Parmesan (I use Romano)
4 T butter
2 T lemon juice
1 1/2 lbs boneless chicken breasts (pounded thin)
cream (optional)

  • Beat egg in bowl and add cheese until consistency of thick batter like cornmeal muffin mix.
  • Add lemon juice
  • Thickly coat chicken breasts with batter and drop in sizzling hot melted butter
  • May need to add more butter as you cook. 
  • Cook through on each side deepening on the thickness of chicken.
  • Remove chicken from skillet and add some cream to deglaze the pan and make gravy to pour over chicken.  
If you don't want to use the cream to deglaze the pan, you can always use a little chicken broth. 

 I use Fat Free Half and Half in place of recipes that call for heavy cream and you really cannot tell the difference and it's very low in calories and DELICIOUS!


Tuesday, May 4, 2010

Pizza

I use to buy my pizza dough from the grocery store or even a pizza shop.
 
A few years ago my husband gave me a Kitchen Aid Mixer 
and most of the time now,
I  make my dough using my mixer. 
IT'S REALLY EASY.

And REALLY INEXPENSIVE!

INGREDIENTS:

1 (.25 ounce) package active dry yeast
1 cup water (110 degrees)
2 cups flour
2 tablespoons olive oil
1 teaspoon salt
2 teaspoons white sugar

DIRECTIONS:

In a small bowl, dissolve yeast in warm water.
Let stand until creamy and tiny bubbles start to appear, about 10 minutes.
In your mixer fitted with the dough hook, combine 2 cups flour, olive oil, salt, 
white sugar and the yeast mixture.
Mix well to combine.
Beat until a stiff dough has formed.

Turn out dough onto your counter and knead by hand for a few minutes.  
If the dough is sticky, add more flour.  
Place dough in a greased bowl, cover and allow to rise 
until doubled in volume, about 30 minutes.

Turn your dough out onto a well floured surface.

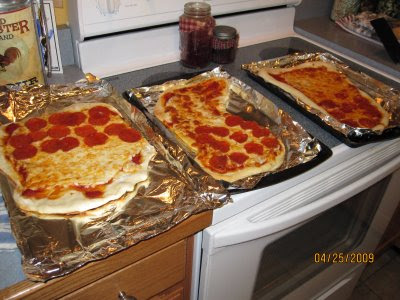
Form the dough into the shape you desire, square, round, etc.  

Cover with your favorite sauce and toppings.

Bake in a preheated 425 oven until golden brown.


The Colonel and Michael making pizza together about a year ago.
When I make pizza, I don't use a rolling pin.  
I just shape the dough with my hands.  
You can see Michael had a lot of fun "shaping" the dough!
ENJOY!

Monday, May 3, 2010

Philadelphia Cream Cheese Pound Cake

This recipe comes from Nicole.

Nicole made this pound cake for her daughter Elizabeth's birthday 
celebration after karate one week.
I was only able to get a crumb! 
But let me tell you that crumb was so delicious!

I am definitely trying this recipe soon!

Ingredients:

2 sticks unsalted butter, softened
1 8 ounce package of cream cheese, softened slightly
1 1/2 cups sugar
4 eggs
1 1/2 teaspoons pure vanilla extract
2 cups unbleached all-purpose flour
1 1/2 teaspoons baking powder
1 1/2 teaspoons kosher salt
confectioners’ sugar for dusting

  • Preheat oven to 325 degrees. 
  • Spray four mini loaf pans with non-stick cooking spray, and place on a cookie sheet.
  • In a mixer fitted with the paddle attachment, cream together butter and cream cheese. 
  • Pour in sugar and mix until smooth. Add in eggs, one at a time, mixing well until each is incorporated.
  • While ingredients are mixing, whisk together flour, baking powder, and salt in a separate bowl. Slowly add flour mixture to the wet ingredients.
  • Distribute batter evenly among the four pans and bake until a toothpick inserted in the center comes out clean, about 50-60 minutes.  Let cool and dust with confectioners’ sugar. Wrap any extras tightly in plastic wrap and freeze for up to one month.